Starfield:The Lodge
|
|||
|---|---|---|---|
| Planet | |||
| Jemison | |||
| System | |||
| Alpha Centauri System | |||
| Location | |||
| New Atlantis, MAST District | |||


The Lodge is Constellation's headquarters in MAST district of New Atlantis.
It is located on the outskirts of the city in the parks close to the Residential District. The property is surrounded by a walled garden.
After joining Constellation, you will be given a room free to use and store equipment. The Lodge has numerous workbenches, allowing for research and equipment modification.
People


Magazines, Slates, and Terminals
| Item | Type | Collection | Description | Location |
|---|---|---|---|---|
| Aja Mamasa's Diary | Book | An excerpt from the personal diary of Aja Mamasa, former Constellation chair. | On a shelf in Sarah Morgan's room. | |
| Constellation Guide 01 | Magazine | Constellation Guide | Permanently reduces fall damage by 5%. | On a railing surrounding the artifact display. |
| Governor's First Meeting Agenda | Note | Coe Heritage | An agenda for the very first meeting of the Governor of Akila (Solomon Coe) and his cabinet. | On a shelf in Cora Coe's basement room. |
| Report on Constellation | Slate | A 2283 SSNN news report about Constellation's near-collapse. | On the desk in Walter Stroud's room. | |
| Sebastian Banks' Speech | Slate | Constellation founder Sebastian Banks' stirring 2276 speech to United Colonies leadership | On the coffee table in Walter Stroud's room. | |
| Sir Livingstone's Second Journal | Book | Snow Globes | A journal on an explorer's visit to the Apollo Landing Site on Luna. | On a table in Matteo Khatri’s room. |
Layout[edit]
The main door leads into a small lounge on the ground level. A door on the member's level leads to a roof garden. A door in the basement leads into the Well.
Ground level[edit]
Lounge[edit]
The door ahead (west) leads to the library, a staircase to the right (north) leads to the member's level, and an initially locked door below the staircase leads into the basement.
Library[edit]
The door to the east exits into the lounge. The south side has three glass doors to the conservatory garden. A balustrade on the member's level runs along the north side. Below the balustrade are niches for a desk and a cozy seating corner with a fireplace.
The library is filled with collectibles and bookshelves. The centerpiece is an exhibition of artifacts that Constellation has collected. Constellation Guide 01 is on a railing surrounding the artifact display.
Beyond the artifact display area is a large conference table with a display screen set into it.
Conservatory[edit]
The conservatory garden is for contemplation, usually the quiet kind. It has a couple of benches and a small table arrangement. A Moth Vine grows here where you can harvest fiber.
Member's level[edit]
Climbing the staircase from the ground floor, a door to your right (north) leads up a small stair to another door opening onto the exterior roof garden. The door ahead (west) leads onto the balustrade overlooking the library.
This level has a bar, a bathroom, a common room, and rooms for many of Constellation's members.
Balustrade[edit]
The balustrade has three doors to the right (north) and leads to the bar.
Initially, these doors will be closed. The first door leads into Walter's room. The second door leads into the principal member's hallway. The third door leads into a room that is initially occupied by Sarah and may become Sona's room.
Bar[edit]
The bar opens upon the balustrade, and has a rear doorway to another long hallway.
It has a dart board, seating, tables, and a Cooking Station. Sir Livingstone's Journal is on a table behind the bar.
Principal hallway[edit]
Entering the cross hallway via its door from the balustrade, there are two doors to the left (west), and three doors to the right (east).
The first door on the left is a second door into Sarah's corner room. The second door on the left is another door into Matteo's corner room.
The first door on the right is a second door into Walter's corner room. The second door on the right is an unnecessarily small shared bathroom with a toilet, a sink, supplies and towels, and unfortunately no shower. The third door on the right is Noel's corner room.
The north end of the cross hallway opens into the rear hallway.
Residential hallway[edit]
The rear hallway runs east-west parallel to the balustrade. At its west end, the hallway turns south toward the bar. Proceeding from the west, it has four doors on the left (north) and four doors on the right (south).
To the left (north), behind the first door is a tiny utility room with some cleaning utensils and shelves. Proceeding along the hallway, a side area with paintings and ship models has a door on its left into Andreja's room. The next door opens into a storage room that is part of Sam's suite. The final door accesses Sam's bedroom itself.
To the right (south), the first door is a small common room, the second door is the player's room, and the third door is for Matteo's corner room. Then, the cross hallway leads south to the balustrade. A final door accesses Noel's corner room and lab.
Common room[edit]
The inexplicably small common room is filled with a large table, a display projector, and a projection screen.
Player's room[edit]
Your room is decorated in a blend of the Lodge's cozy style with some modern additions.
In addition to a bed for sleeping, a safe for storage has unlimited capacity. Your Chronomark Watch Case is on a shelf.
Andreja's room[edit]
Andreja's room is fairly dark with few decorations. A chinese console, a bed, and an office desk line the three walls opposite the door. Its two weapon crates cannot be opened.
Matteo's room[edit]
Matteo's room is decorated calmly with less clutter than most of the Lodge, ideal for spiritual contemplation.
Sir Livingstone's Second Journal is on a desk.
Noel's room[edit]
Noel's room is very utilitarian with a lot of space for work and less space to live. It has a Pharmaceutical Lab.
Sam's suite[edit]
Sam's suite has two rooms. The bedroom is decorated in an eclectic style, with a large corner desk, exercise equipment, boxes, packing crates, and tools. The second room has another smaller desk, cleaning equipment, utility shelves, piles of boxes, and some covered furniture. It may have been Cora's room in the past.
Sarah and Sona's room[edit]
This probably once was Aja Mamasa's room. Aja Mamasa's Diary is on a shelf. It is decorated in the cozy style of the Lodge with nautical elements.
The bed is initially owned by Sarah. If Sona comes from Cassiopeia I during In Memoriam, it will become Sona's room.
Walter's room[edit]
Walter's room is elegantly decorated in a more modern style than the rest of the Lodge.
Sebastian Banks' Speech is on a coffee table. Report on Constellation is on the desk.
Basement[edit]
The basement's layout is a series of rooms. It has two exits. A staircase from the workshop leads up to the lounge. A door from one of the rear rooms leads to the Well.
The workshop opens to the west into another room that has not much purpose except as a crossing. The door to the south is Cora's room. The door to the west is a bathroom with a toilet, a sink, and no shower.
To the north, a passage leads into another mostly empty room. From that room yet another passage leads to the display room. A passage to the west leads into the basement storage room.
Workshop[edit]
The workshop has all crafting stations: A Research Lab, a Cooking Station, an Industrial Workbench, a Pharmaceutical Lab, a Spacesuit Workbench, and a Weapons Workbench. It also has the Constellation Mission Board.
Cora's room[edit]
Cora's room is decorated with a lot of posters and has a screen above the bed. It seems to be another storage room that has been repurposed for Cora.
The Governor's First Meeting Agenda is on a shelf.
Display room[edit]
A Mark I Spacesuit is on a mannequin inside a display case that is locked with master level security.
Storage room[edit]
The storage room has a door that leads into the Well.
Notes[edit]
- By carefully looking at the door frame on the right side of the mannequin display case about halfway down, you can get a prompt to grab the armor through the door. This will allow you to acquire a very valuable and decent set of gear very early in the game.
Dialogue[edit]
Board and Lodging[edit]
| Quest: | FFLodge01 |
|---|---|
| Scene: | FFLodge01_Stage10_Noel_TL |
| ... | Player | Noel |
|---|---|---|
| Sarah said something about a place for me to stay. | Planning on sticking around, then? Good. |
- "I think we can find a spot for you... And along the way, I can give you the very abbreviated tour."
--
- "Right. So you've seen the library, obviously... Walter's quite proud of the collection, but Matteo has made more than a few contributions."
- "Gardens are out the doors there, if you need a moment of quiet contemplation. Emphasis on the quiet part, at least usually."
- "Let's head upstairs."
- "Sebastian Banks, Constellation's founder, had this place built decades ago. It was a big to-do at the time, but most people in the city have forgotten we're here."
- "So this is the bar. Usually no tender, so help yourself. Within reason, of course."
- "Now, let's see about that room."
- "You're in luck. We were almost at max occupancy already, but there's still one room up for grabs. It's been nice, having the place so full."
- "Okay, this will be you. Common room on one side, so that'll be quiet, and Matteo on the other side, so... maybe a little less quiet."
- "I'm sure Sarah has something planned for each of us, so I'd better get back to it. Don't want to keep her waiting too long. Enjoy!"
Constellation Scenes[edit]
- in New Atlantis
Andreja and Barrett[edit]
| Quest: | DialogueUCTheLodge_Convo26_BarrettAndreja |
|---|---|
| Scene: | DialogueUCLodgeConvo_Scene26_BarrettAndreja |
- Hey, Andreja. I hope all is well with you?
- Andreja. Everything going okay?
- Andreja! Hey. Having a good day, I hope?
- Aha! Andreja. Are you doing all right?
- It is.
- Indeed.
- Yes.
- I am.
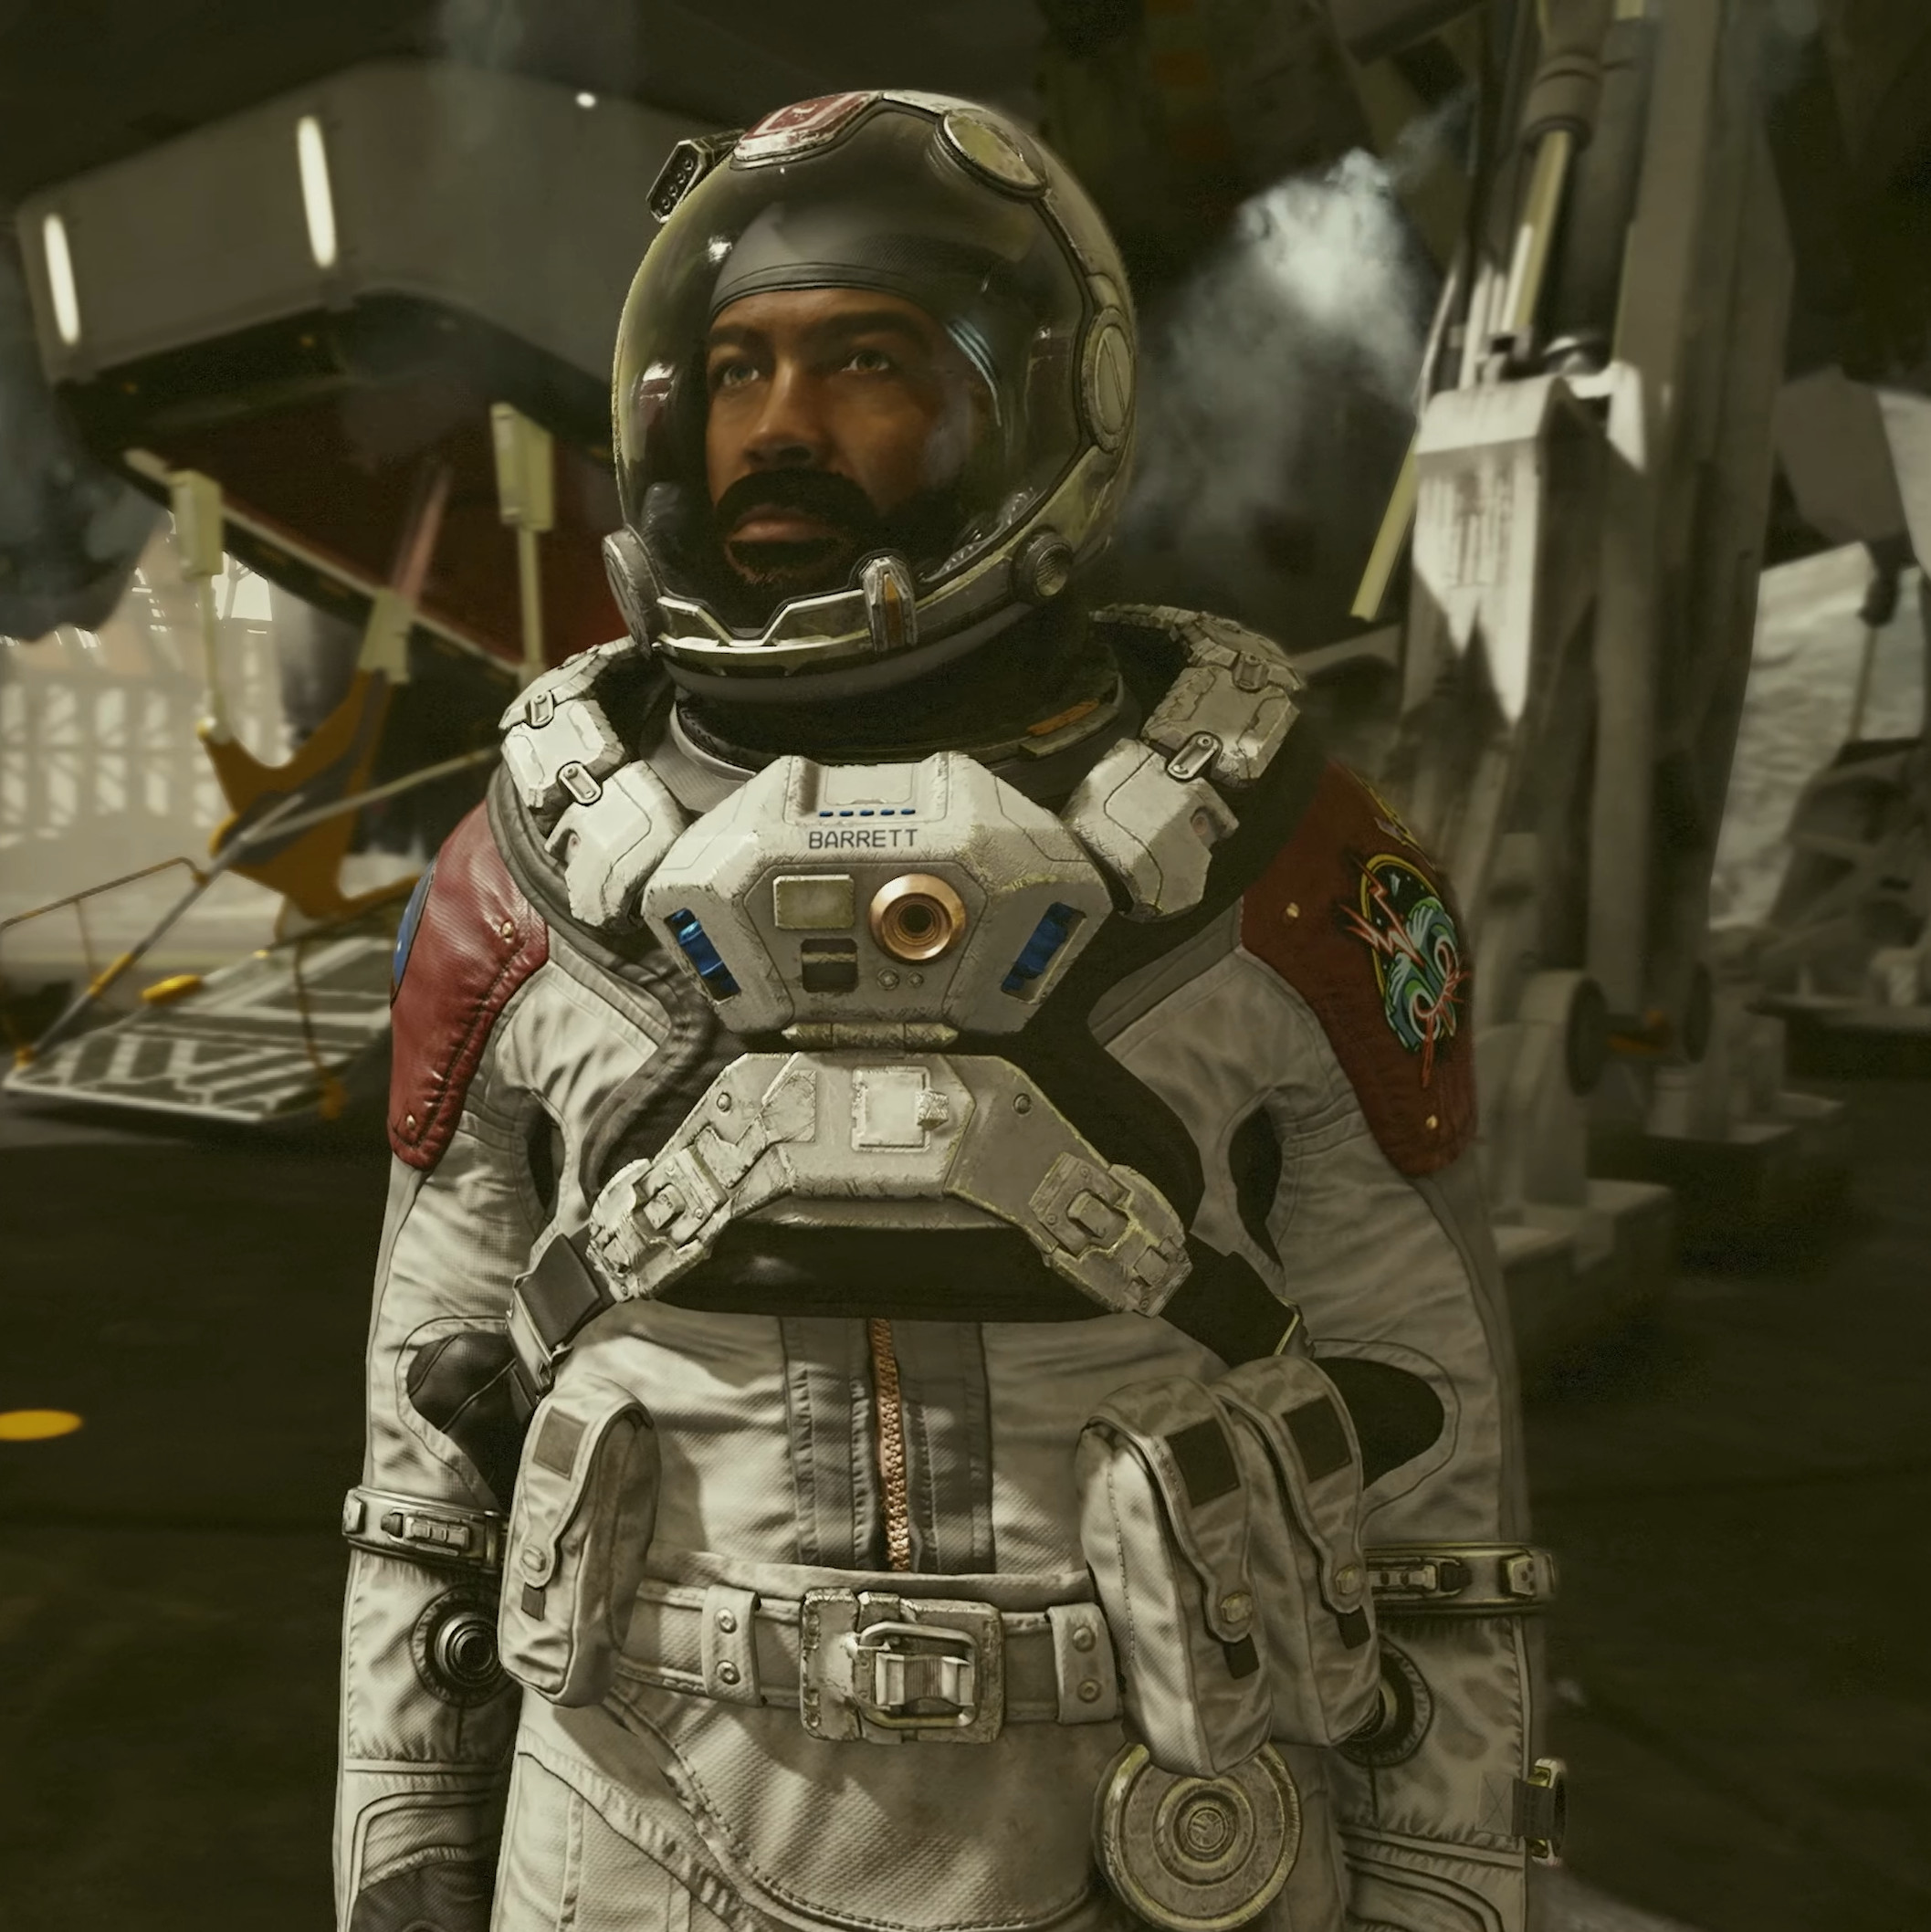
Barrett:
- Good, good.
So, I've got some new board games... Vasco and I could use another player if you're interested? - So, once a month or so we like to have a movie night around here... you can pick the next movie if you want?
- So I was thinking about cooking a big meal for everybody... if you're interested, I'd love an extra hand?
- Noel and I are going to set up an experiment to artificially simulate metallic hydrogen under extreme pressure. You in?
Andreja:
- I am not.
- I decline.
- No.
- I do not want to be involved.
Barrett:
- No worries, no worries.
Maybe another time, right? - Hey it's okay, we do this a lot. Maybe next week instead?
- That's quite all right. Maybe another time then.
- If you feel up to it later, let me know.
Andreja:
- I will not change my mind about this.
- I doubt it.
- No. I do not think so.
- I appreciate the attempt to pull me into your activity. But no.
Andreja and Matteo[edit]
| Quest: | DialogueUCTheLodge_Convo03_AndrejaMatteo |
|---|---|
| Scene: | DialogueUCLodgeConvo_Scene03 |
- So, Andreja... Where did you say you were from?
- Hey, I forget... Where in the Settled Systems did you say you grew up?
- We were talking that one time, and you said you were from... where? I can't remember.
- I have never mentioned that. Ever.
- Where I grew up has never been a subject of discussion.
- I have never discussed that.
Matteo:
- Oh, okay... Sorry, must've confused you with someone else. If you ever want to swap stories, though...
- Ah, my fault. Bit of a mixup, then. Well, if you ever want to sit down and laugh about the good old days...
- No? Huh. I must have mis-remembered. Well, if you ever did want to talk about it, I'd be happy to lend an ear.
Andreja:
- Thank you, but that is not a subject I wish to discuss.
- No thank you. But I appreciate your... curiosity.
- I do not think so. But thank you for your interest.
Matteo:
- Okay. Gotcha. Good talk.
- Right, then. I'll just... go.
- Mmm-hmm. Some other time, then...
Andreja and Sam[edit]
| Quest: | DialogueUCTheLodge_Convo14_AndrejaSam |
|---|---|
| Scene: | DialogueUCLodgeConvo_Scene14 |
Sam:
- Hey, Andreja. Had another run-in with Zealots, huh?
- Indeed I did.
Sam:
- Guess you handled it all right, since you're here and not at Reliant Medical.
Andreja:
- I did what I needed to do.
Sam:
- I'm sure you did.
| Quest: | DialogueUCTheLodge_Convo15_SamAndreja |
|---|---|
| Scene: | DialogueUCLodgeConvo_Scene15 |
- Sam, I do not know if you recall my suggestion, but if Cora ever needs self-defense training...
Sam:
- Oh, yeah. I remember all right. Very aware of the offer.
Andreja:
- Well, I am still available if you are interested.
Sam:
- Okay, uh-huh. Sure. Got it. Thanks again.
Andreja and Sarah[edit]
| Quest: | DialogueUCTheLodge_Convo20_AndrejaSarah |
|---|---|
| Scene: | DialogueUCLodgeConvo_Scene20 |
- Andreja, do you read much?
- Do you read often, Andreja?
- How do you feel about books, Andreja? Enjoy reading much?
- Finding the time is sometimes difficult, but yes, I do enjoy it.
- It is perhaps not the primary way I choose to spend leisure time, but I do not have anything against reading.
- I find I need to concentrate to be able to focus on a book, and that takes effort. But I do sometimes enjoy it, yes.
Sarah:
- Noel and I sometimes share books. Bad ones, honestly, more often than not. You could join us, if you liked.
- I've started something of an impromptu book club with Noel. Nothing serious, just for fun. Think you'd be interested?
- You know, Noel and I will occasionally find a bad novel to read, and then joke about it after. We'd love to get another opinion, if you wanted to join us.
Andreja:
- I... might enjoy that. I will let you know.
- That sounds... fun? I appreciate you asking.
- You would want me to be part of this? That is kind of you. I will consider it.
Sarah:
- No pressure, it's just something to take our minds off all this. You're always welcome.
- Okay. Just say the word, and you're in.
- All right, I'll be sure and have an extra copy just in case.
Barrett and Cora[edit]
| Quest: | DialogueUCTheLodge_Convo23_BarrettCora |
|---|---|
| Scene: | DialogueUCLodgeConvo_Scene23_BarrettCora |
- Hello Cora. What are you reading these days?
Cora:
- I'm reading a book about plants written by somebody from Constellation a hundred years ago!
- He wrote about this experiment with some xerophytes that he found on ten different planets!
- It's amazing! He made a brand new kind of plant! Like he did it all himself.
- It's so wow!
Barrett:
- Wow that sounds really...
- Wait.
- What's the author's name?
Cora:
- Like, Marvin Madani or something.
Barrett:
- From a hundred years ago, huh.
Cora:
- I'll put the book back when I'm done, don't worry!
Barrett and Matteo[edit]
| Quest: | DialogueUCTheLodge_Convo13_BarrettMatteo |
|---|---|
| Scene: | DialogueUCLodgeConvo_Scene13_BarrettMatteo |
- Hey, Barrett. We're just doing some scans on the, uhh, the artifacts. Have you seen the, uhh... the thing?
- I was just going to do some scans, and I was looking... for, y'know, the thing.
- Hey Barrett, I can't find the... The thing, for scanning. Have you seen it?
- You're going to have to give me a little more to go on, pal. Which thing are you looking for?
- Matteo, we've got, like, several dozen 'things' that might be useful. Can you narrow it down a little bit?
- I would love to help you, but I'm going to need just a bit more information.
Matteo:
- You know, the... the thing. The one with the, uhh, the prongs? Is that what they are? The bit that sort of sticks out, with the... you know...
- Oh, come on, you know what I mean, right? The thing! The one that has the screen, with the dials...
- Ah, right. Well, it's the one with the plugs, and the little probe things that you clip on, and... uhh...
Barrett:
- You have no idea what you're looking for, do you.
Matteo:
- No, I do not.
- Not a clue. Noel told me, and I have forgotten.
- No, but I have good intentions. That should be enough, right?
Barrett:
- I will find you something to play with.
- Okay, don't worry. I'll track something down for you.
- All right, I will find and bring you an array of devices that may or may not serve your purpose. Sound good?
| Quest: | DialogueUCTheLodge_Convo25_BarrettMatteo |
|---|---|
| Scene: | DialogueUCLodgeConvo_Scene25_BarrettMatteo |
- Barrett! The book I left for you in your room is about the commonality of spiritual beliefs... did you have a chance to read it?
- My friend... I sent you a wonderful discussion about old Earth religious beliefs the other day.
Did you have time to listen to it? I found it to be very enlightening. - Oh... Barrett, have you already read that text I sent you on the nature of the human soul?
- Yes, Matteo. I'm aware of those philosophical stances already.
- I must have missed it... but it's okay, Matteo. I'm reasonably aware of these philosophies.
- Matteo, I mean this sincerely my friend... I don't think I need more information to understand the gist.
Matteo:
- I find it to be truly fascinating how so many beliefs have so much in common. Don't you?
- It is so interesting to me that all sorts of people came to similar conclusions.
- I love how similar themes about the goodness of humanity shine through in so many of these texts.
Barrett:
- Yet so much differs between the philosophies... surely that is also significant?
- Commonalities do not correlate to actualities, my friend.
- Seekers prefer the mathematical union of all beliefs... I prefer the intersection... the shared humanistic foundations.
Matteo:
- The differences in thought are situational based on the history of the people whose lives it enhances.
- I think about that too, but things involving humans may be flawed in translation, don't you think?
- I prefer to consider the intention of the beliefs rather than the precision.
Barrett:
- All of the data points should be considered, even or especially the ones that do not quite fit.
- If the conclusions are significantly derivative, there's probably a flaw in the hypothesis.
- If the methodology leads to alternative conclusions, perhaps the premise itself is flawed.
Matteo:
- I have the perfect text for you... it clears it all up. I'll leave it in your room when I have a moment.
- You are asking for a mathematical formula that creates hope, dreams, and love.
- I understand why you say that, but I think it is my own fault for not explaining better.
Barrett:
- All right, Matteo. We'll have to pick this up another time.
- Matteo, I love you my friend, but we'll have to continue this another time.
- You're a kind person, Matteo.
Maybe next time we should talk about sports instead, though.
Barrett and Noel[edit]
| Quest: | DialogueUCTheLodge_Convo24_BarrettNoel |
|---|---|
| Scene: | DialogueUCLodgeConvo_Scene24_BarrettNoel |
- Noel, whenever you're bored I've got a seat in the ship with your name on it.
Noel:
- I don't know... I have a lot of work to do.
Barrett:
- What are you working on, if you don't mind me asking?
Noel:
- Analyzing some of Sarah's recent data from the field. We're going to collaborate on a study.
Barrett:
- She doesn't know you're working this hard, does she?
Noel:
- I've always worked hard. That was the only way that I could get here.
- My work is all I have... no wealth, no connections, and my timing is all wrong.
Barrett:
- You've earned the right to be here, Noel.
Noel:
- Maybe I'll take you up on that seat sometime... after I get some more work done.
Barrett and Sam[edit]
| Quest: | DialogueUCTheLodge_Convo16_SamBarrett |
|---|---|
| Scene: | DialogueUCLodgeConvo_Scene16 |
- Hey, Sam! What do you think you're doing, just hanging around here? Don't you know you're wasting Walter's hard-earned credits?
Sam:
- Hey buddy, you're hanging around just as much as I am!
Barrett:
- I know. Pretty nice to take a load off for a bit, huh?
Sam:
- You won't hear me complain.
| Quest: | DialogueUCTheLodge_Convo17_BarrettSam |
|---|---|
| Scene: | DialogueUCLodgeConvo_Scene17 |
Sam:
- Barrett... Don't you still owe me 100 credits?
- What? No, I paid you back two weeks ago!
- Are you kidding me? Matteo said he'd cover me!
- No, no, you've got it all wrong! Don't you remember - you told me it was your treat, that I didn't have to pay you back!
Sam:
- What? That's what you said last week! Come on!
- That is not at all how I remember it.
- Come on, seriously! You've gotta pay me eventually.
Barrett:
- Okay, okay... Remind me again next week, will you? I'll get you back.
- All right, you got me. I'll scrape something together for you... Next week, maybe?
Barrett and Sarah[edit]
| Quest: | DialogueUCTheLodge_Convo18_BarrettSarah |
|---|---|
| Scene: | DialogueUCLodgeConvo_Scene18 |
- Spending some extra time in the Lodge, are we?
- Yes, ma'am. Noel's not the only one with a scientific background, you know.
- You may recall that very recently, while on mission I have been both rendered unconscious and kidnapped. I thought being here might be a nice change of pace.
- There is only so much universe to explore, boss. I've got to pace myself.
Sarah:
- Fair enough. Carry on.
- Well, I do insist that we sit down and catch up properly sometime soon.
- Let's just keep the hijniks [sic] to a minimum, shall we?
| Quest: | DialogueUCTheLodge_Convo19_SarahBarrett |
|---|---|
| Scene: | DialogueUCLodgeConvo_Scene19 |
- Hey, Sarah. You holding up okay? Can't be easy being in charge of all this.
- I didn't exactly need a reminder, but I'm doing fine.
- Barrett, expressing actual, honest concern? I am shocked!
- You needn't fear, Barrett. Possibly the biggest mystery in history rests on our - my - shoulders, but I'm sure it will be fine.
Sarah:
- Unless, of course, you're suggesting you'd like to take over?
- I don't suppose you're after the job, are you?
- Why, would you care to take the reins for a while?
Barrett:
- We both know I am the last person that should have that kind of responsibility.
- Oh, no thank you! I am quite content with my lot.
- Not a chance! I'm glad I dodged that bullet!
Barrett:
- But hey, you know where to find me if you ever need anything, okay?
- I am glad to know you're all right, though.
- We're all here for you if you need us. Remember that.
Barrett and Vasco[edit]
| Quest: | DialogueUCTheLodge_Convo12_VascoBarrett |
|---|---|
| Scene: | DialogueUCLodgeConvo_Scene12 |
- Vasco, quick! Top three one-liner moments!
- Yes, Barrett.
Vasco:
- Number three: Your retort to the Crimson Fleet raiders on Leonis III..
Barrett:
- Yes. Classic.
Vasco:
- Number two: Your wisecrack about the Ashta and the miner to the patrons of the Stoneroot Inn.
Barrett:
- I was on a roll!
Vasco:
- Number one: Your counter to the demands of the Ecliptic captain in orbit around Tau Ceti V.
Barrett:
- Hmm. That was a good one, but I'm not sure it's the top.
Vasco:
- That is the list you provided to me, in the exact order you dictated. Shall I update the listing?
Barrett:
- Let me think on it, buddy. I'll get back to you.
| Quest: | DialogueUCTheLodge_Convo21_BarrettVasco |
|---|---|
| Scene: | DialogueUCLodgeConvo_Scene21_BarrettVasco01 |
- Vasco, I asked you to remind me about something... what was it?
- Specify the time frame.
Barrett:
- Recently... in the past month maybe.
Vasco:
- There are fifty-eight items on the reminder list, starting from the top...
Barrett:
- Wait! Uh. Just the most recent thing then.
Vasco:
- The most recent request was to remind you that you should cut back on spicy food.
- You said this while you were eating an entire tray of Spicy Chunks.
- So I was instructed to remind you before the next time.
Barrett:
- Mm... yeah. I mean no, not that one.
- What did I say before that one?
Vasco:
- You said remember to check on the experiment. The one that might explode.
Barrett:
- Oh yeah, no. That exploded already. What about the one before that?
Vasco:
- You showed me a picture of a planet with multiple trajectories associated with orbiting bodies.
- You said this planet might hold the key to understanding the nature of---
Barrett:
- That's it! I remember what it was now!
- But where am I going to find that many Spicy Chunks?
Vasco:
- Barrett, I must remind you---
Barrett:
- Not now, Vasco. This is science.
| Quest: | DialogueUCTheLodge_Convo22_BarrettVasco |
|---|---|
| Scene: | DialogueUCLodgeConvo_Scene22_BarrettVasco02 |
- Vasco, we haven't run a deep diagnostic on you in a while, have we?
- I do not know. Sweetie.
Barrett':
- Uh... what did you call me?
Vasco:
- I did not formally address you, honey.
Barrett:
- Vasco, can you repeat what you just said?
Vasco:
- I did not formally address you, handsome.
Barrett:
- Let me just... run a couple of tests...
Vasco:
- Understood. I will prepare my system to begin the diagnostics.
- This will run as a background process, honey bundles of joy.
Barrett:
- Good grief. Who did this to you, Vasco?
Vasco:
- I do not know what you mean, Mr. Muscles.
Barrett:
- I mean, it is kind of nice though.
Vasco:
- What exactly are you referring to, my precious pumpkin?
Barrett:
- Uh. Nevermind.
- Vasco, please quarantine any recently modified code relating to communications.
Vasco:
- Yes, sir.
Barrett and Walter[edit]
| Quest: | DialogueUCTheLodge_Convo11_WalterBarrett |
|---|---|
| Scene: | DialogueUCLodgeConvo_Scene11 |
- Hey, Walter! Did you follow up on that investment tip?
- Well, Mr. Stroud? Did you investigate that company I mentioned?
- So, Walter. That tip I gave you. Panned out, didn't it?
- It appears you may have provided information that Stroud-Eklund could profit from in the future, yes.
- You know very well I don't publicly disclose my investment strategies. But.... yes, it looks very promising.
- It's possible that I may have found your information useful.
Barrett:
- Told you!
- Ha! I knew it. You didn't believe me, but I was right.
- Ha ha! No need to thank me, Walter. Just slip a few credits under my pillow when you can.
Walter:
- All right, where exactly do you get your sources? I have to know!
- You can gloat all you want, so long as you tell me how you came by that information in the first place.
- Barrett, seriously, how do you find these things out?
Barrett:
- Oh, I know a guy. And he knows a girl, and she went to a conference in Neon. We all had a few drinks, traded some stories, and here we are.
- Bumped into a fellow in Paradiso. He was there on vacation, I was running a lead. We got to talking. Turns out he's got connections. I guess I do, too.
- Why, Walter! I'm offended. What kind of man do you take me for? You have your methods, I have mine.
Cora and Noel[edit]
| Quest: | DialogueUCTheLodge_Convo08_CoraNoel |
|---|---|
| Scene: | DialogueUCLodgeConvo_Scene08 |
Noel:
- Hey kiddo. How's the life of an adventurer?
- Hi Cora. How's it been, traveling with your dad?
- Hey, Cora. How's it going? Enjoying planet hopping with your dad?
Cora:
- Dad says "there's rarely a dull moment." Then I remind him he's not the one who gets left on the ship.
- I guess it's fine. I wish I didn't always have to stay on the ship, though.
- Ehh, it's okay. Kinda wish I got to do stuff outside the ship more often.
Noel:
- Well, it's gotta be tough for your dad too. He wants you with him, but he's trying to keep you safe.
- Yeah, I hear you. But your dad's just trying to take care of you as best he can, without leaving you here at the Lodge all the time.
- I think it's pretty great that you get to go with him. But he's still your dad, and so he worries about you. Wants to make sure you're safe.
Cora:
- Yeah, I guess.
- No, I know.
- I know. It's not all that bad, I guess.
Noel:
- Trust me, kiddo. You've got a dad who loves you very much, and that's a really big deal.
- Just don't ever forget that he loves you, okay? Being close to your family is a really wonderful thing, even if it means a little more time on the ship than we might like.
- Just remember that he loves you a lot. And try and give him a hug every now and then, okay?
Cora and Walter[edit]
| Quest: | DialogueUCTheLodge_Convo06_WalterCora |
|---|---|
| Scene: | DialogueUCLodgeConvo_Scene06_WalterCora |
Cora:
- Hey Mr. Stroud, got a second?
- Can I ask you something, Mr. Stroud?
- Mr. Stroud, I've got a question.
- Of course, Miss Coe.
- By all means, Miss Coe. Ask away.
- Hmm? What can I do for you, Miss Coe?
Cora:
- You're rich, so you own a lot of stuff. Like, a lot, a lot. What's your favorite thing?
- Since you have your own company and you're rich, you must own a lot of things. Do you have a favorite?
- You're the richest person I know. Do you have a favorite thing that you own?
Walter:
- That's an interesting question. I'm afraid I don't really think about it too much in terms of what specific things I own, though.
- I hate to disappoint, but I tend to not dwell on material possessions any more than necessary.
- Well, I... I don't really look at it like that. My success has allowed me a great many experiences, which I value more than possessions.
Cora:
- Oh. That's too bad. I thought maybe you'd say, like, a moon or something.
- Really? Huh. If I was rich I'd have a list of my favorite things.
- Not even, like, a spaceship, or a giant vault full of gems? Huh.
Matteo and Noel[edit]
| Quest: | DialogueUCTheLodge_Convo01_NoelMatteo |
|---|---|
| Scene: | DialogueUCLodgeConvo_Scene01 |
- Hey, have you been up to The Eye recently?
- When's the last time you went up to see Vladimir?
- Have you talked to Vladimir recently? Face-to-face, I mean?
Noel:
- Huh. Guess it's been a while. Why?
- I haven't needed to go up there in a bit. Why?
- Haven't gone up there recently. Is everything okay?
Matteo:
- Oh, I just don't know how he does it. Up there all alone for so long.
- He just goes weeks without seeing anyone. It'd drive me crazy.
- I just wonder if it bothers him, being up there all alone. I sure couldn't do it.
Noel:
- Some people love that kind of space. Pun intended.
- I'm sure he's fine, but you could always give him a call if you're really worried.
- Aww, I wouldn't worry about it. He really loves it up there.
Matteo and Sam[edit]
| Quest: | DialogueUCTheLodge_Convo09_SamMatteo |
|---|---|
| Scene: | DialogueUCLodgeConvo_Scene09 |
- She still won't tell me, Sam!
- No luck, Sam! I can't get it out of her!
- I got nothing, Sam. Nothing! She won't tell me!
Sam:
- Absolutely. Totally. Uhm, who are you talking about?
- Hang on. I think you're missing a noun there. Who is "she"?
- That's one way to start a conversation. So... who is this mysterious "she"?
Matteo:
- Andreja. I keep asking where she's from, and she keeps dodging the question. It's driving me crazy!
- Come on, you know... I've asked Andreja where she came from, and she just won't tell me. At all. I can't take it!
- I have asked where Andreja comes from, like a hundred times, and she just will not even give me a hint!
Sam:
- With tack [sic] like yours, it's a wonder she hasn't told you all her secrets by now.
- She's one of us, Matteo. No need to give her the third degree.
- Again with this? Matteo, you've... You've gotta let this go. It's getting unhealthy.
Matteo:
- No, I just... Something about her story just doesn't add up for me.
- I'm just saying... We don't really know a lot about her. It's weird, right?
- Come on, seriously. She's beyond secretive. It's weird!
Sam:
- You gotta let this go. Everybody's got things they'd rather keep to themselves.
- We all got a past here. Constellation works because everyone respects each other and let's [sic] the good ol' days stay in the good ol' days.
- If she didn't have secrets, that would be even weirder. Give her space.
Sam:
- Vladimir has vouched for her time and time again, and she's come through for us every time. It's okay to not know every little thing but still trust someone.
- From everything I've seen she's been a pure positive for Constellation. Heck, Sarah vouched for her. Good enough for me.
- Vladimir and Sarah both brought her in, and have never had a bad thing to say. So she likes to keep her distance - her prerogative. Just relax.
Matteo:
- Yeah, I guess you're right.
- Okay, yeah. You're right. I'll try and let it go.
- Yeah, I suppose. I'll try to not let it bother me... But no promises.
Matteo and Walter[edit]
| Quest: | DialogueUCTheLodge_Convo04_MatteoWalter |
|---|---|
| Scene: | DialogueUCLodgeConvo_Scene04 |
- Well, Khatri? Pilfered any priceless antiquities lately?
- Stolen any sacred relics recently?
- So, Matteo. Swiped any new religious texts?
- Very funny, Walter. You know Constellation's been keeping me busy.
- Haha, I don't have much time for that kind of thing anymore. So much to do around here, you know?
- You really aren't going to let it go, are you? I'm so busy with our work here that I don't think about it much these days.
Walter:
- I know you too well to believe that. You've got to have a line on something.
- Right, sure. You're telling me you haven't been on the lookout at all?
- I wasn't born yesterday, you know. I'd bet you have your eye on something.
Matteo:
- If you must know, there's rumors of an 18th century English translation of the Bhagavad Gita I was following up on.
- Well, okay... fine. I had heard that Buddha's Tooth may still exist. Was trying to find out if there's any truth to it.
- All right... There's a chance that a 15th-century edition of Aquinas' Summa Theologica is out there. I've been asking a few questions in my spare time.
Walter:
- Ha! I knew it. Well, best of luck.
- Maybe this one will turn out better than the last time, eh?
- Let me know how it turns out...
Noel and Sarah[edit]
| Quest: | DialogueUCTheLodge_Convo07_NoelSarah |
|---|---|
| Scene: | DialogueUCLodgeConvo_Scene07 |
- So, Noel... Constellation living up to your expectations?
- I trust you're still satisfied with your choice to join Constellation, Noel.
- I hope you're still glad you joined Constellation, Noel.
Noel:
- Yes ma'am, of course! I honestly can't imagine being anywhere else.
- Absolutely, Sarah. I've never regretted the decision.
- It's a dream come true, Sarah. You know that.
Sarah:
- Just making sure. Bright young girl like you, there are no shortage of opportunities.
- You've been an invaluable asset to the group, Noel. Just wanted to make sure you didn't regret it.
- I'm glad to hear it. You could've done just about anything, so it's important to me that you feel valued here.
Noel:
- It's not always easy, but I just remind myself that if it weren't for you, and for Constellation, I'd have no idea that any of this was going on.
- There are days that are tough, sure, but if I weren't here I wouldn't even know about all the incredible things we're discovering.
- Okay, maybe not every single day is a dream come true, but the work we're involved in, the discoveries we're making... It's all worth it.
Noel and Walter[edit]
| Quest: | DialogueUCTheLodge_Convo05_WalterNoel |
|---|---|
| Scene: | DialogueUCLodgeConvo_Scene05 |
Noel:
- Walter, I hope I'm not overstepping here, but...
- You mind if I ask you kind of a personal question, Walter?
- Walter, you don't have to answer this, but I was wondering something.
Noel:
- You sure spend a lot of time on Constellation business. Doesn't Issa miss you?
- You're around the Lodge a lot. Like, almost all the time. Doesn't that bother your wife?
- You don't seem to spend much time at home. How is that not a problem for your wife?
- Ah. Yes, well... My wife and I have something of an understanding.
- That is a rather personal question, but I'll indulge it.
- It's true, I am away from home quite a bit.
Walter:
- I have been informed that when I am home, I remain preoccupied with Constellation's work, which renders me "cantankerous."
- I'm told that when I'm not here, I am distracted by what I might be missing, and wind up "crabby." Or my personal favorite, "irascible."
- Apparently I become rather cranky when I am not able to participate in Constellation's little adventures.
Walter:
- My wife has therefore decided it is best if I can dedicate my time to our business here for now. For both our sakes.
- My darling Issa has concluded that it is in both of our best interests if I can spend my time working from the Lodge as often as possible.
- It has been determined that for the long term health of our relationship that I am better off here, rather than simply making things worse at home.
Noel:
- Huh. Well, if it works for you...
- Okay then. I guess if you're both okay with it...
- Wow, all right. Whatever works for the two of you, I guess.
Sarah and Walter[edit]
| Quest: | DialogueUCTheLodge_Convo02_WalterSarah |
|---|---|
| Scene: | DialogueUCLodgeConvo_Scene02 |
- Another round of invoices coming in soon, Walter.
- Hope you've got your pen at the ready, Walter. Bills to sign and all.
- You mind putting your signature on some documents? The money-related kind?
- Never ends, does it? Dare I ask what I'm paying for now?
- It's almost as if you think I'm made of credits. What is it this time?
- Ugh, I suppose. What am I paying for now?
Sarah:
- Fuel isn't free, I'm afraid. This Artifact hunt is keeping us busy.
- Artifacts won't find themselves, and us going after them means fuel, repair costs, the occasional payoff...
- Progress requires funding, I'm afraid. And we're making good progress these days.
Walter:
- Sometimes I think you only keep me around because I pay for everything.
- Good thing you've got me around, Ms. Morgan. Who knows how you'd get by on your own.
- Of course, of course. I'm just a walking bank account, aren't I?
Sarah:
- Nonsense, Walter! Your sparkling personality is why we love you. The credits are just a bonus.
- You don't fool me for a moment, Walter. You love it, and you know it.
- You and I both know you have the credits to spare, and you love every minute of this.
Vasco and Walter[edit]
| Quest: | DialogueUCTheLodge_Convo10_VascoWalter |
|---|---|
| Scene: | DialogueUCLodgeConvo_Scene10 |
- Hello there, Vasco.
- Greetings, Walter Stroud. How may I assist you?
Walter:
- Oh, no - I don't need anything. Just, ah, just checking in. Seeing how you're doing.
Vasco:
- At present, all systems are functioning well within established parameters.
Walter:
- Right. Well then... Keep up the good work.
Vasco:
- Affirmative.
- Of course. I have been given no alternate instructions.
- Yes Walter Stroud. I will.
| |||||||||||||||||||||||||||||